How to Verify Smart Contracts on Etherscan
Saturday, 10 August 2019 · 3 min read · ethereum solidity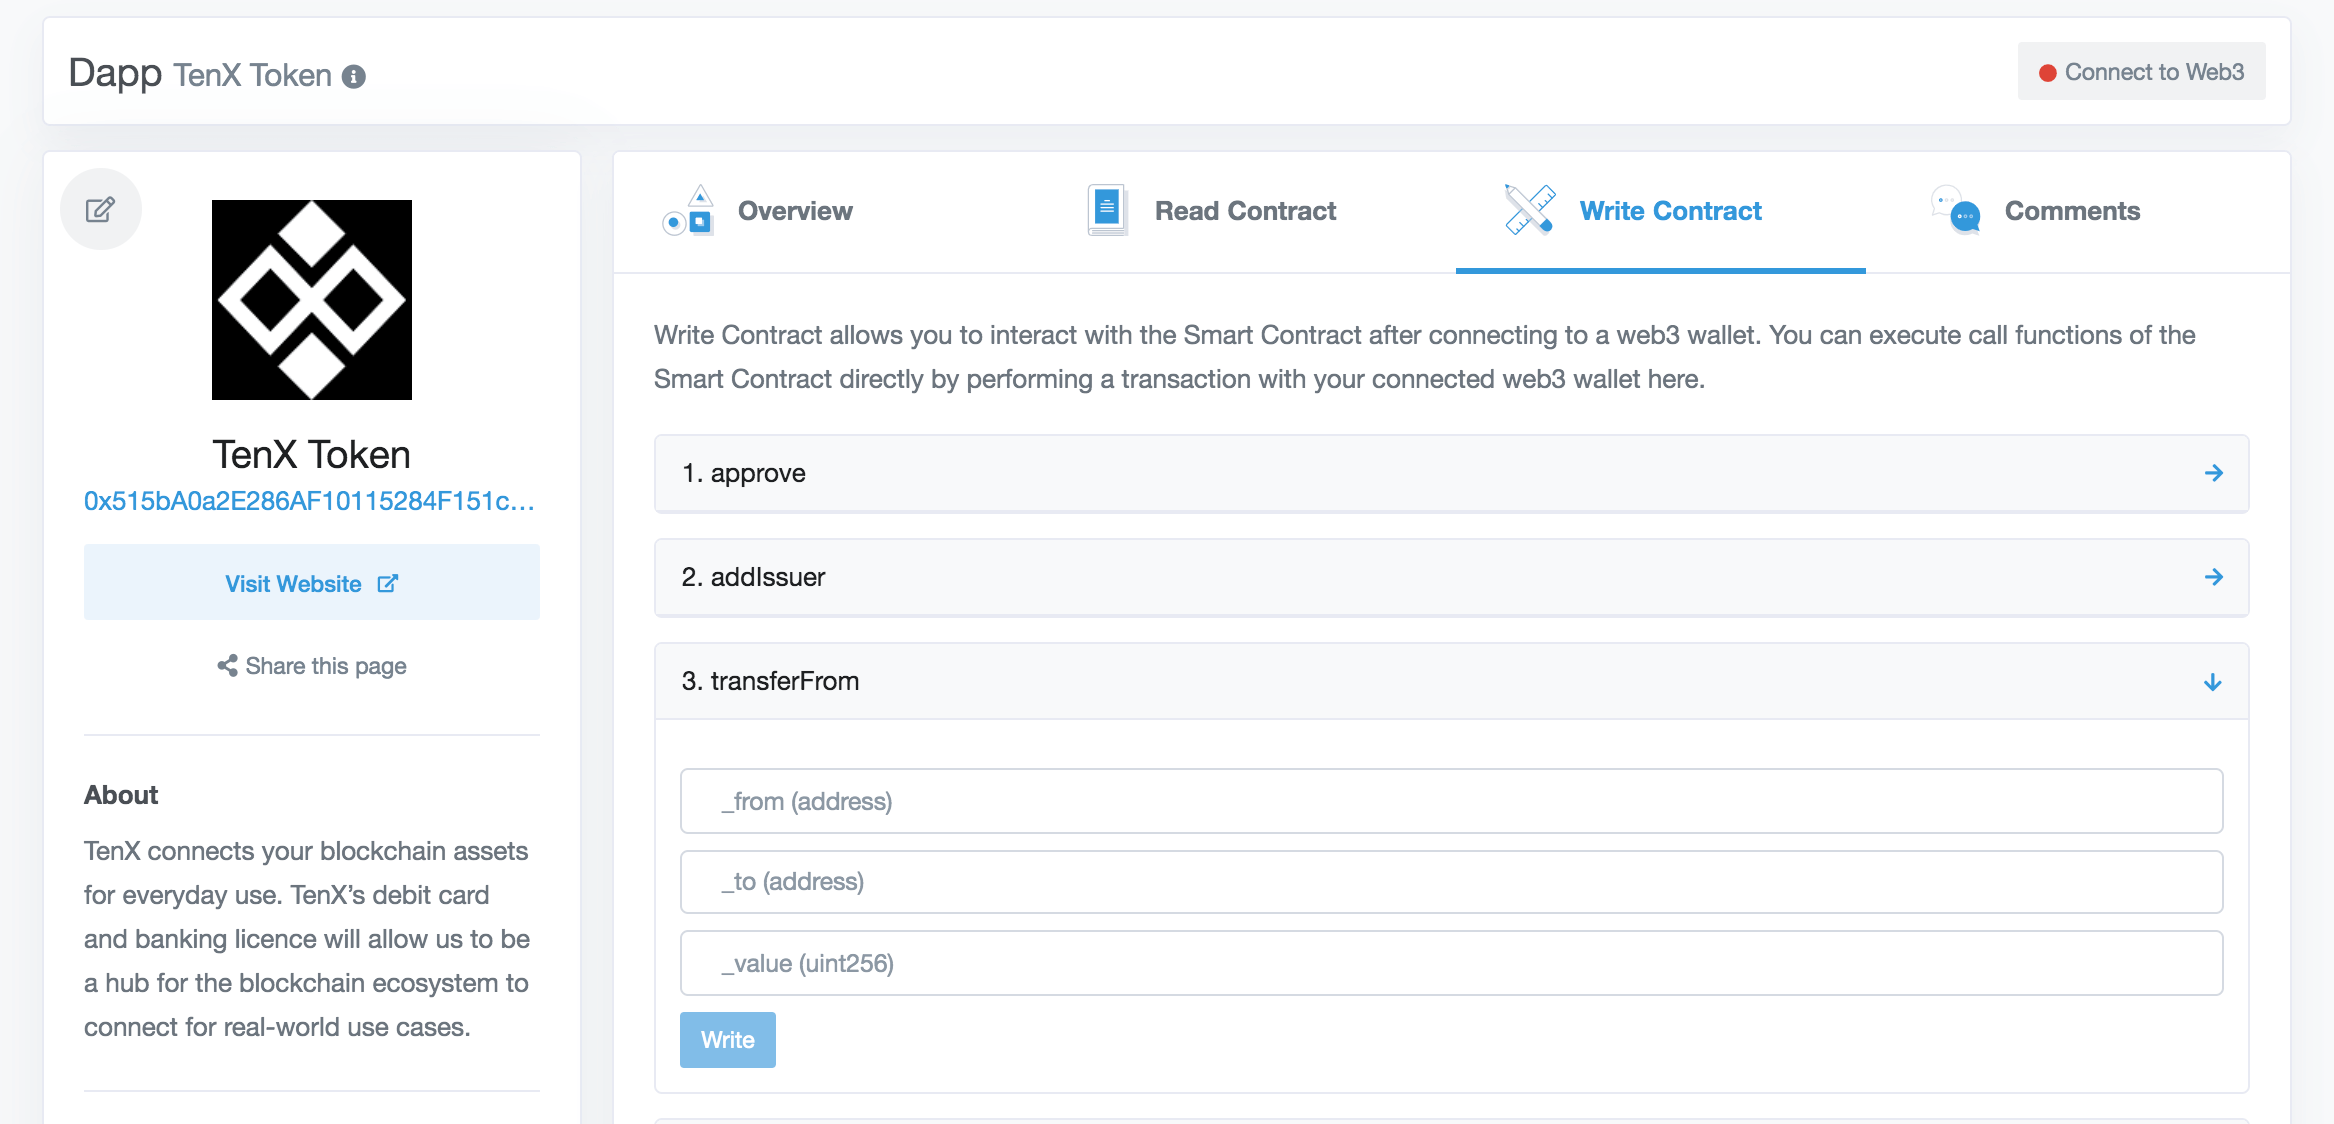
Do you need to quickly build a web UI for your smart contracts? Etherscan can do that for you! Read on to learn how to verify your Solidity smart contracts on Etherscan.
📬 Get updates straight to your inbox.
Subscribe to my newsletter so you don't miss new content.
Use Plugins If You Can
On Hardhat? Use the hardhat-etherscan plugin.
On Truffle? Use this Truffle plugin to automatically verify after every deploy.
You can now skip the rest of the article. The rest of the guide shows you how to verify contracts manually.
Manual Guide
First, you’ll need it to flatten your Solidity contract into a single file for Etherscan. This means merging your files and their dependencies in the right order.
Flatten your Solidity contract
Install truffle-flattener or sol-merger.
npm install sol-merger -gRun:
sol-merger \"./contracts/*.sol\" ./mergedVerifying on Etherscan
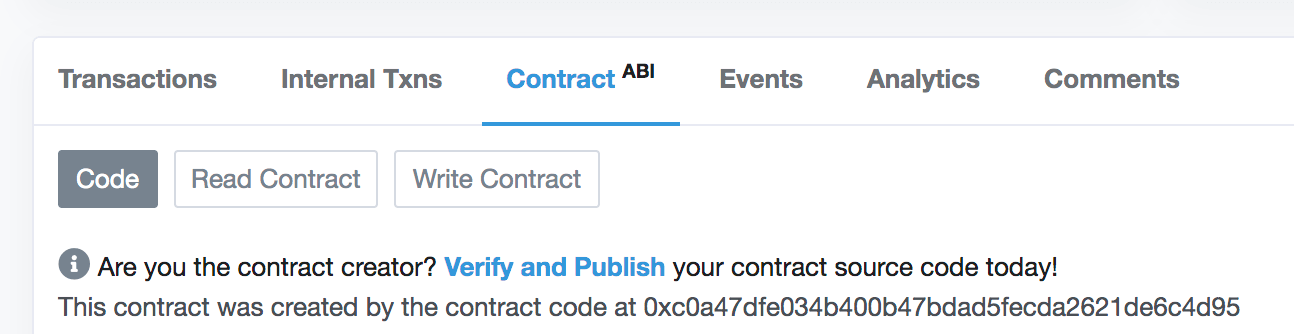
Go to your contract’s Etherscan page. Click ‘Verify and Publish’:
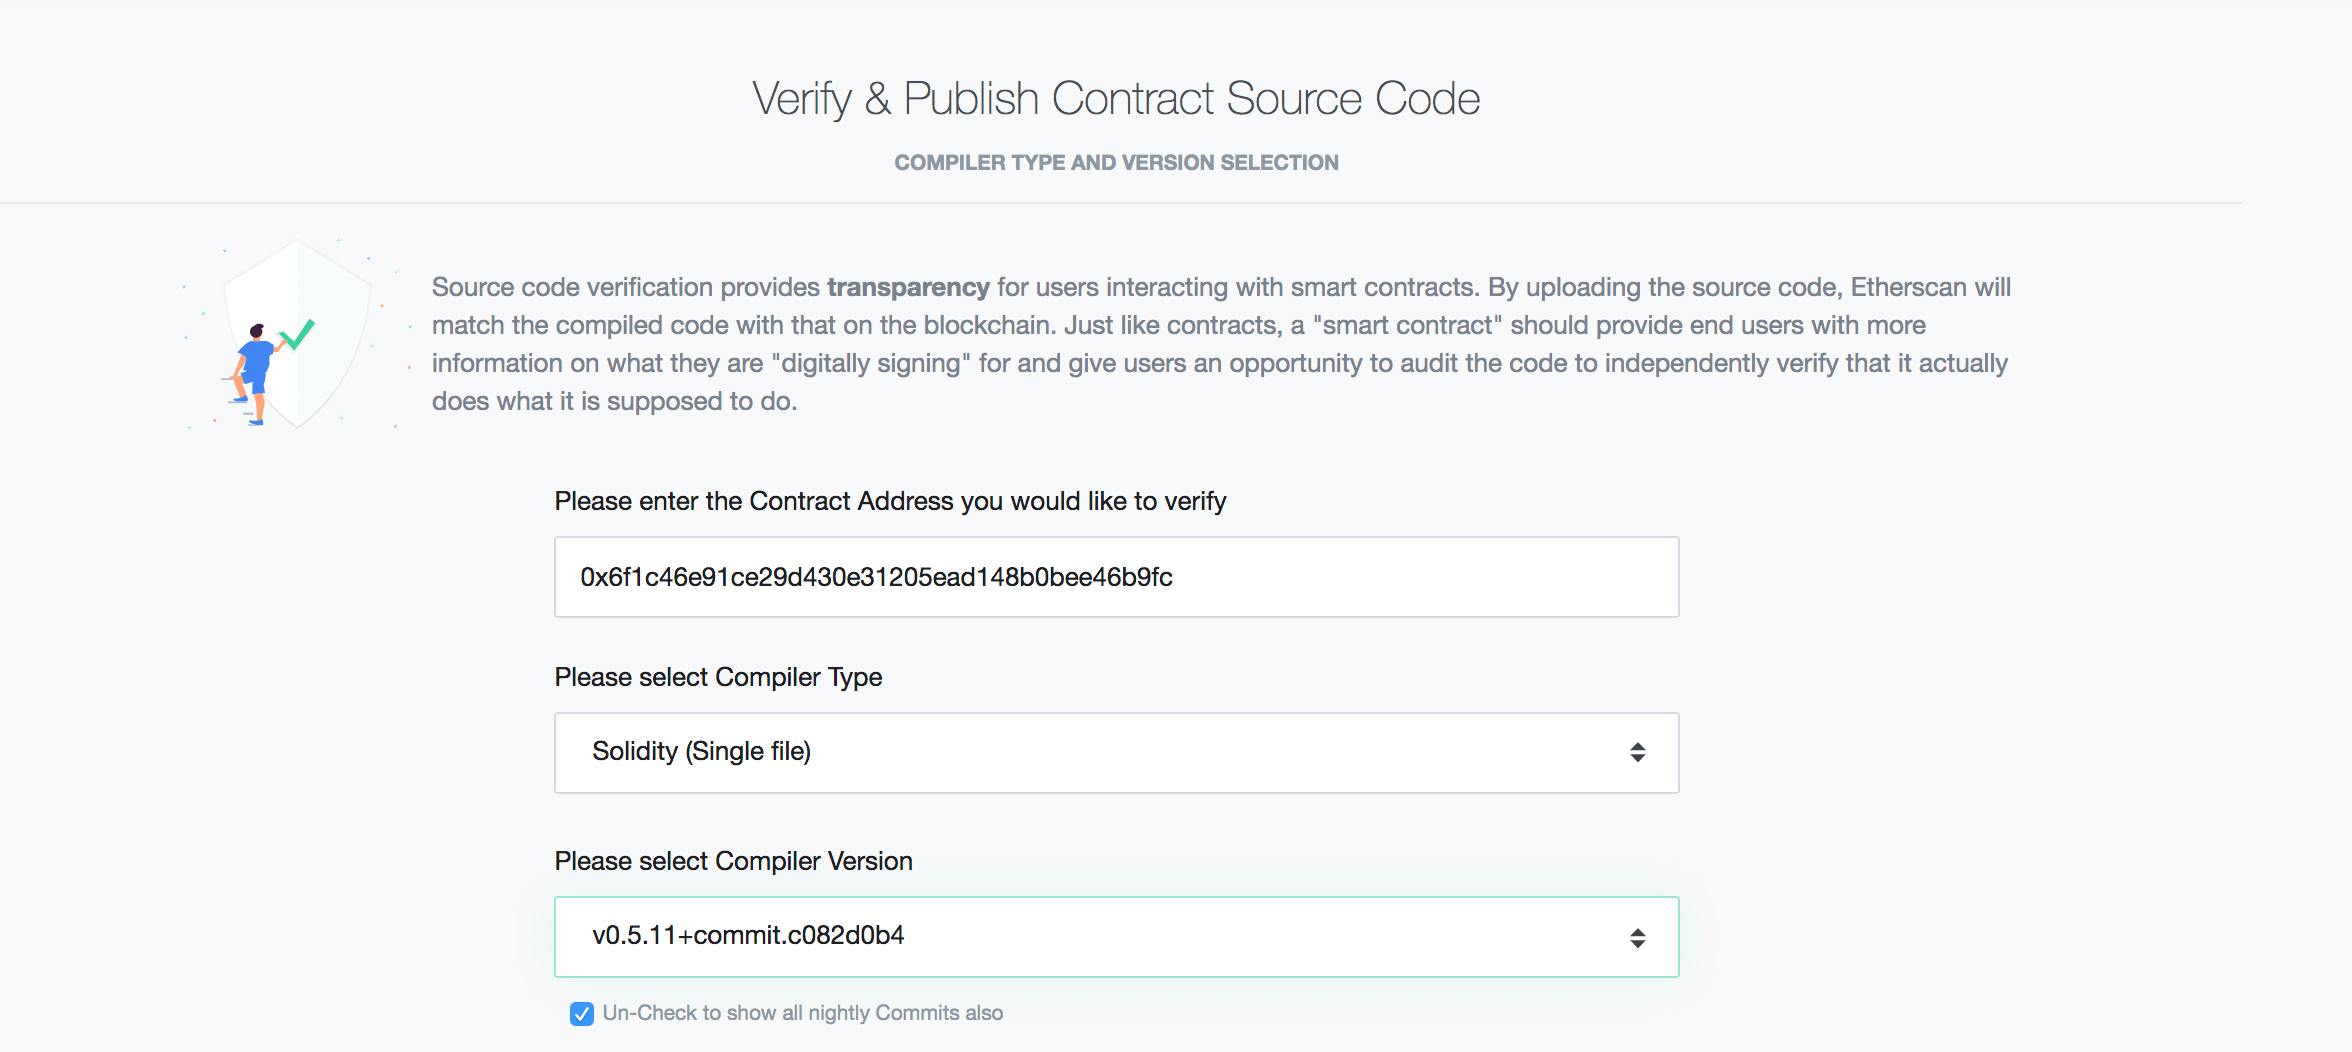
Select the ‘Solidity (Single file)’ Compiler Type and your Soliditty Compiler Version. Press Continue:
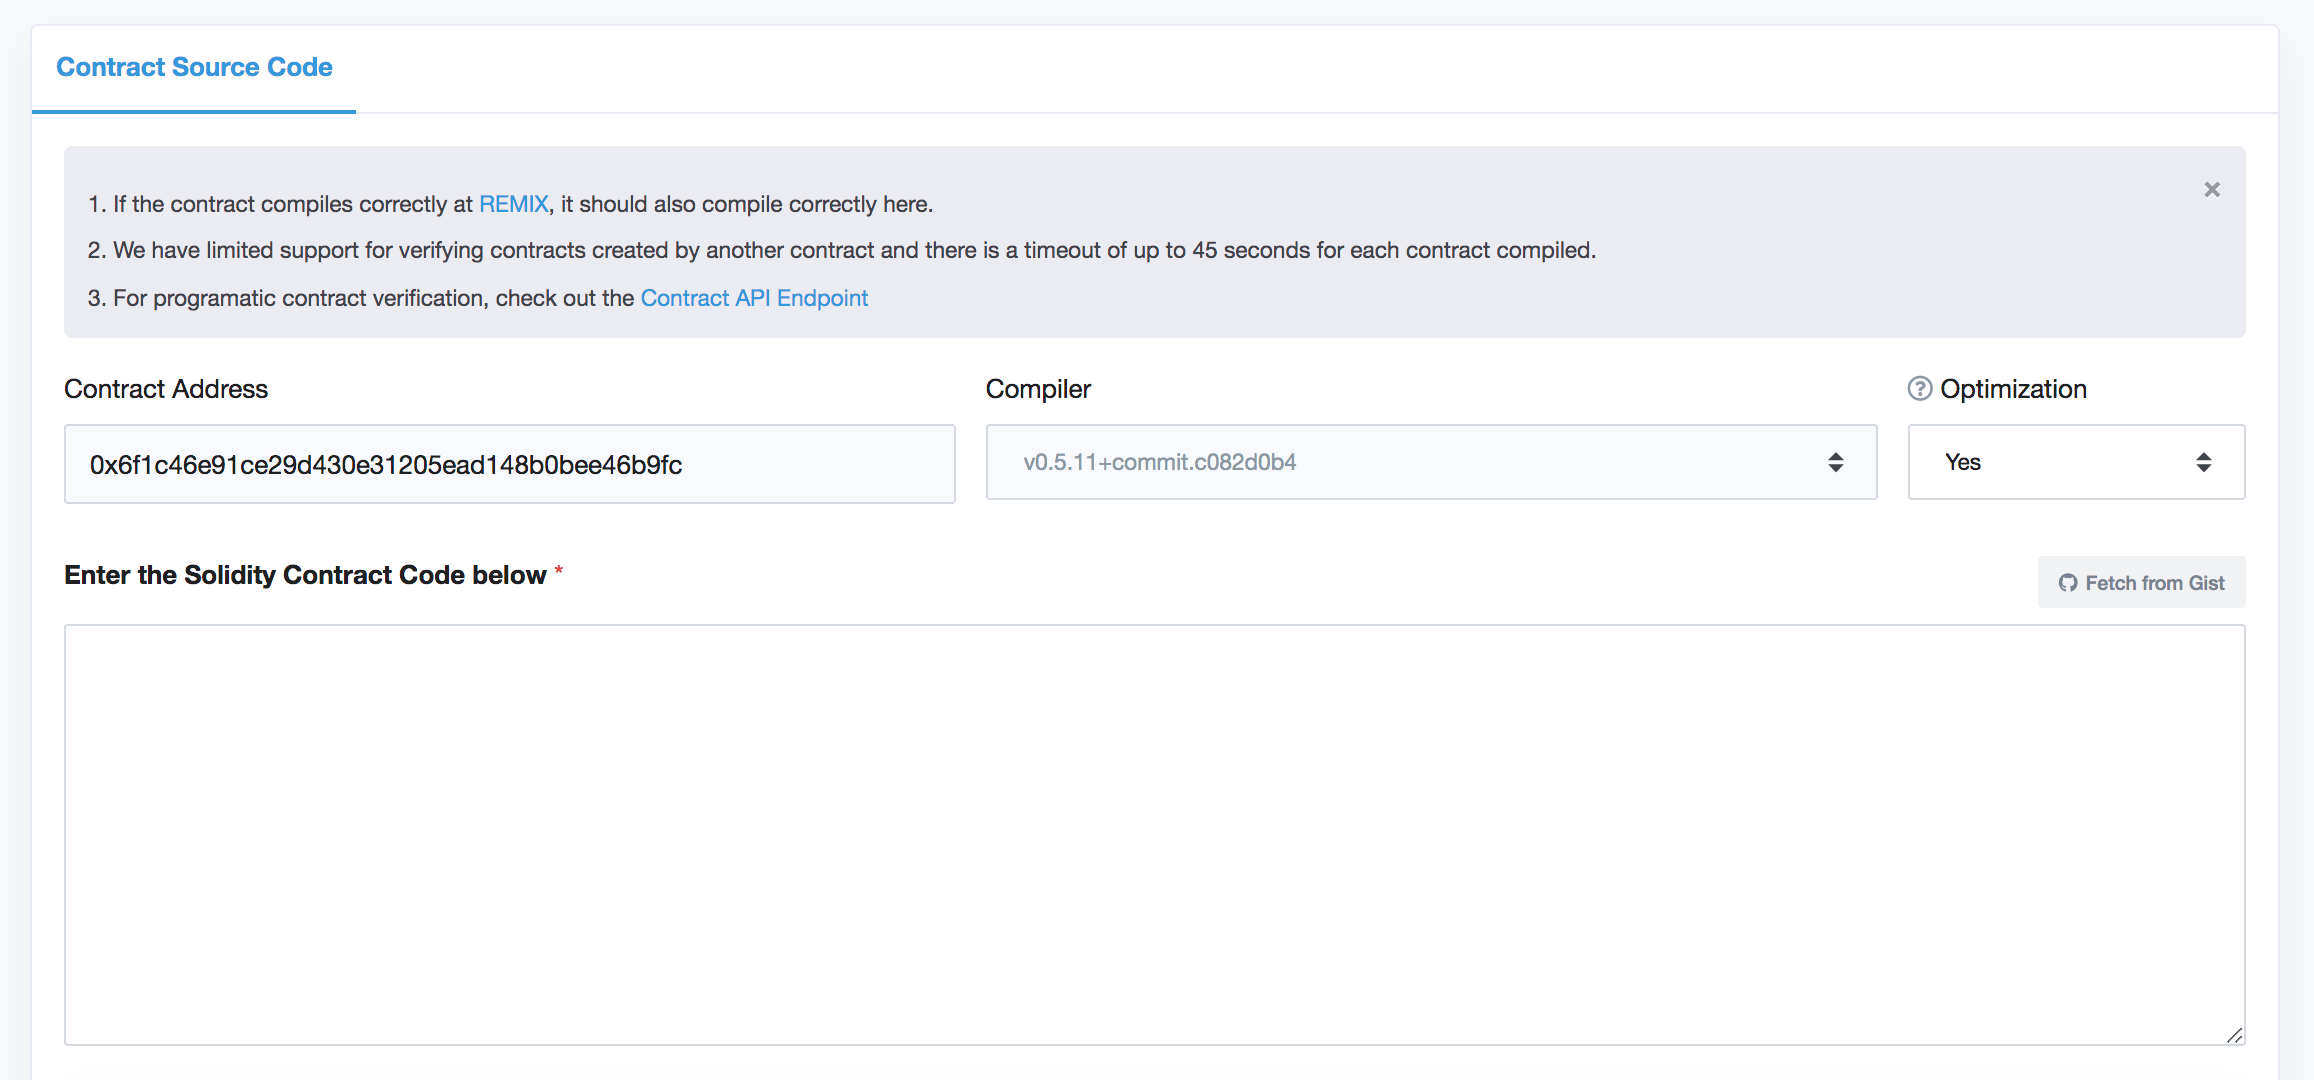
Paste in your flattened Solidity contract.
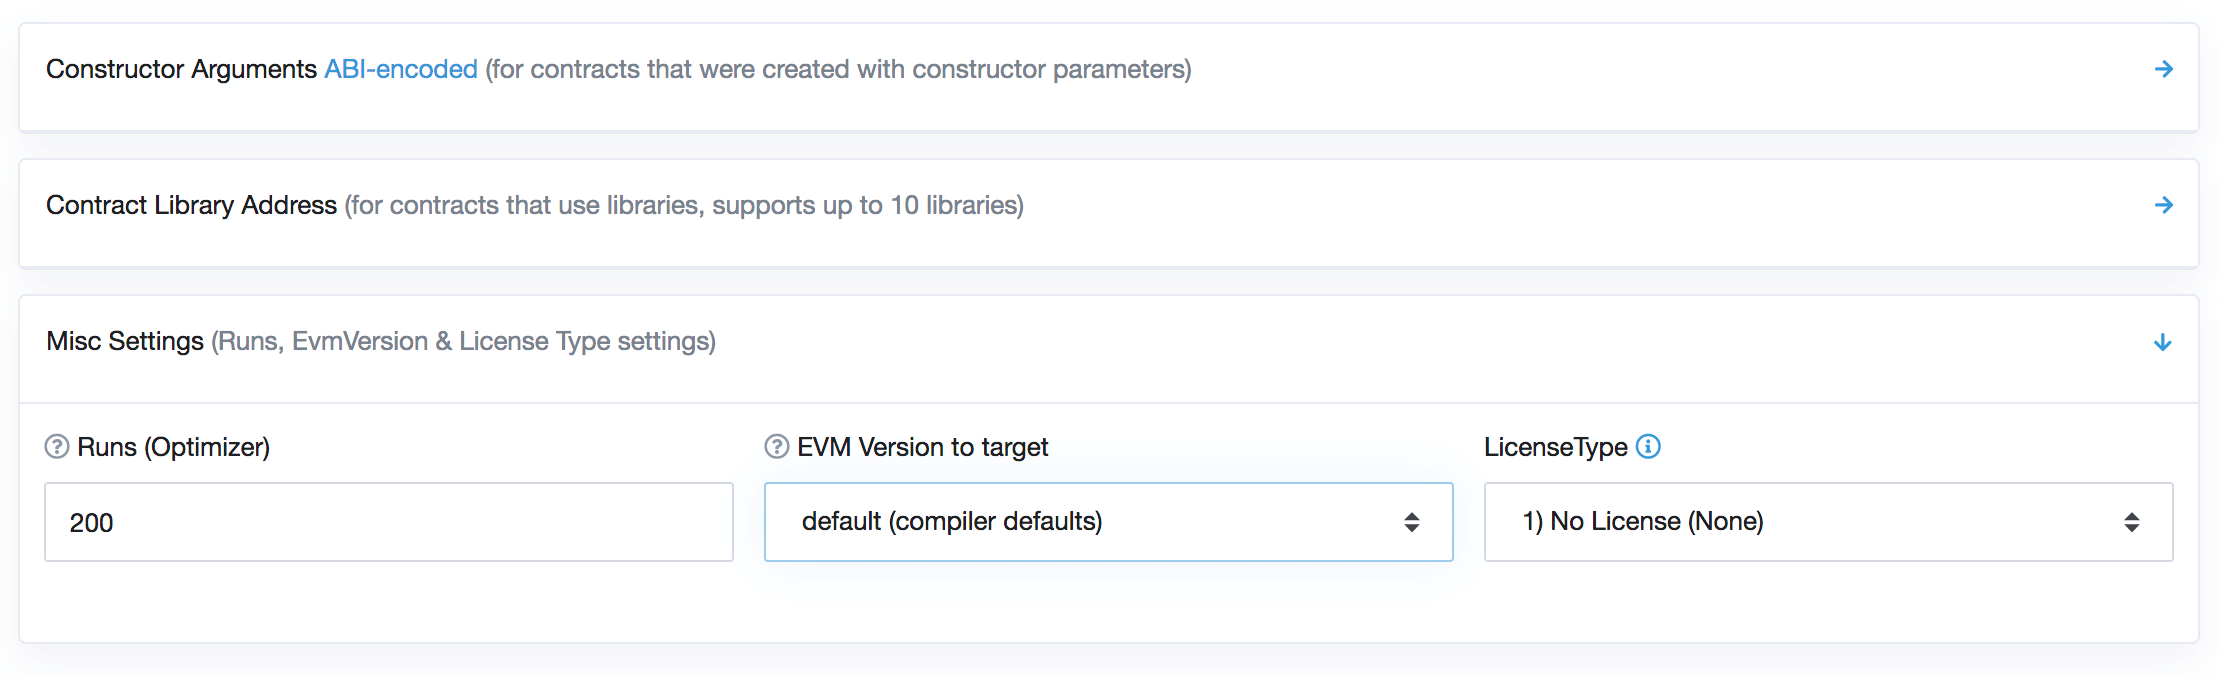
Your constructor arguments should be filled in automatically. Otherwise, find the deployment transaction of your contract and retrieve them from the trailing bytes. Each argument supplied to the constructor is ABI-encoded and looks something like: 00000000000000000000000022bc795b5b8154fe619724e7cb1f4b931cd39c11.
If you’ve enabled optimization in Solidity compilation settings, be sure to specify ‘Optimization’ and ‘Runs’ to match those settings.
In Closing
That’s it! Your contract source code will be verified on Etherscan. You will also get a web UI for your smart contracts at etherscan.io/dapp/<contract address>.

A Message From the Author 👋
📬 Get updates straight to your inbox.
Subscribe to my newsletter so you don't miss new content.